Showing posts with label original. Show all posts

Tuesday, December 18, 2018

Japan: Design Festa Fall 2013, Part 03


Design Festa is a massive, multi-media event that engulfs the Tokyo Big Sight twice a year for several days each time, gathering some of the greatest creative talents and artists from the world over.  It's seriously so massive that I had to divide a single day's visit into three different blog posts! You can catch up on those here and here. While their main focus is on giving local artists and artists from the nearby regions a platform to mingle and network along with a space to share their various creations, whether they be dancers, seamstresses, special effects artists, illustrators, print-makers, mask-makers, leather-crafters, etc. etc. The point is, all forms of creative expression are welcome, and so this massive space near Odaiba is transformed twice a year into a surreal, sensory-overload of creative output. It's pretty incredible, and an awesome experience if you ever get the chance to attend! It's Asia's largest art festival! Given that it is twice a year, you get the chance to attend in either their Spring or Summer sessions, and each of those generally extends throughout the weekend so you can try to make it for one day if not all. 

The live acts, from dancing ninja schoolgirls to live rope-bondage demonstrations, do change from day to day, so if you find out about a particular act that you're dead-set on seeing, plan accordingly. Also, tickets are CHEAP! Considering how Tokyo is typically viewed as a high-ticket city to live in or visit, the admission cost of ¥800 in advance or ¥1,000 at the door are really quite reasonable, only amounting to about $8-10US respectively. You can also opt for the two-day passes for ¥1,500 (in advance) or ¥1,800 (at the door) for a single or two-day ticket, which amounts to about $15-$18US for two days of entertainment. Trust me, you'll likely need both days to really take in everything the Festa has to offer. If you can read Japanese, you can order your tickets for the Spring Session of 2019 on May 18th and 19th here, with 0 fees, but you can also pre-order your tickets at any Japanese 711, Circle K Sunkus convenience store, or Ticket Pia! There's plenty more ticketing information available on their website, too!


Sunday, December 16, 2018

Japan: Design Festa Fall 2013, part one


What do you get when you combine some of Asia's most creative artistic minds together twice a year at Tokyo Big Sight? You get a wildly inventive, incredibly diverse array of outstanding talents and creations mingling together, sharing their crafts and selling their wares as part of the ongoing Design Festa Series! As mentioned above, it's a twice-annual festival, occurring in the spring and again in the fall, allowing artisans from across the land (along with nearby countries) to come and share their passion with each other. Meet and greet many of the creative minds themselves, live and in the flesh! Most of who and what I encountered during my visit to the Fall Design Festa of 2013 was thoroughly awe-inspiring, for the precision and sheer imagination or dedication that went into it, while sometimes it was more confounding or awkward, like school girls with fabulously voluminous hair getting railed by a faceless man who appears to be wearing a device intended to, I think, uhh, collect her fluids? 


Huh. But hey, just because it might not necessarily be my cup of tea doesn't mean it isn't a well-crafted piece of art that will titillate someone else! 


But anyway, here are some sweet elephants, in case you're feeling a little disturbed by the blatant hentai above. Remember, though, that these pieces were all publicly displayed for all to see inside of Tokyo Big Sight, so the artist wasn't trying to hide their creation from curious eyes. In fact, completely the opposite! This event is all about getting your work seen and sharing it with others. One of the coolest things about Design Festa is that it's not limited to one particular type of artistry- if you're into cosplay, there were many people milling about in costumes, from furry to space alien, steampunk pirates to mohawk and studded leather sporting punks. All are welcome, and all art is respected. It's a wild experience, and pretty psychedelic when you stumble down some of the more performance arts-oriented groups laden corridors, but do your best to keep your wits. I know it can be hard with the Japanese rope bondage demonstration in one corner, and the friendly lolitas in the other, but there's a lot to see here!

Given just how much there actually is to see here, I've broken this post into several different posts, and it's still pretty photo heavy. I didn't want to exclude any of it, though, because it's all so fabulous!


I hope you enjoy~

Thursday, April 19, 2018

Tie-Dye Throwback


There haven't been too many tie-dye related posts on the blog in a few weeks now, and unfortunately that's due to our being in a bit of a creation-slump. We started to run low on blanks and with my job situation rapidly evolving and changing over the past few months I've been hesitant to put any money towards the hobby when I had more pressing adult matters to worry about (like keeping a roof over my head and food in our bellies)... Things should be changing for the better here soon, and we've gotten some good news and a couple of checks coming in, but we're certainly not rich by any stretch of the imagination. This is part of why I'm so passionate about getting our tie-dye off the ground, though, while it can be a challenging balance to find. We need a day job (for now) to keep afloat but the desire to invest heavily in our own business is strong, too. I can't go crazy and buy all the blanks I would like to, though, because I need to be sure we stay out of the red each month. So far 710Visuals has been a mainly self-sustaining project, but to grow it further I need to bump it up a notch or two out of my comfort zone. Not the easiest thing to do. But I digress.


Since we haven't been making much these past few weeks, please enjoy the photos of a previous batch I don't think I've ever shared here yet. These shirts were all made by Antho while I was over in Korea, so that makes them extra special. Typically we make all the shirts as a team, sometimes one will fold and the other will apply the dye, but when it comes to rinsing and processing them it's a team effort every time... except for this batch, because I was so geographically distant there was just no feasible way I could help outside of texting him instructions and motivation/support. He had to fold, dye, rinse, untie, wash, photograph, process and post all of these all by his lonesome, which isn't the easiest of tasks. I'm proud that he did this, though, and I think it helped him understand more how much work actually goes into the back end of running our shop. I usually handle the processing and listing for everything because I have the desktop computer and have more familiarity with it. It's a team effort here, at 710Visuals! 

Saturday, March 24, 2018

Art: First batch of acrylic pour paintings finished


The first batch of paintings we made have sufficiently dried down enough to get clear coated! It can take awhile for all the paint and liquid on the canvas to fully settle down and solidify, so we let them rest after being made for at least 24 hours, if not longer when possible. Once we felt confident that they were sufficiently solid we took them outside and gave them generous coats of glossy top coat to protect the paints so the paintings will hold up over time. In person they look absolutely fantastic! The clear coat gives added luminousity and lustre to the colors underneath, making them bright and pearlescent... of course, this makes it harder to photograph them because the same gloss that makes them so lovely to look at refracts the light with a fervor that the lens eats up. Flash drowns it out, and the lighting in our studio tends to cast shadows... trying to capture these photos was a tightrope dance of trying to balance reflective shine against shadow. I don't think I completely nailed it, so the actual shop product photos for when these go live will likely be done differently. To be fair, I did this on my own, and Antho is really the skilled light-tech in the relationship. I can point and snap photos but his years working in his high school theater as a technician really helped him learn lighting in technical ways I'm not yet proficient in. I make do with what I've got, though, and tutorials and things have been of exceptionally great use. I swear, there's a youtube tutorial for everything!    


I didn't consider the paintings full complete until after they've dried and been coated, as I wouldn't consider them sellable prior to that. The paints can settle and new aspects revealed, too, during the drying process so there's still more to discover after you've set the painting down post-pour. I have to say that I think these turned out pretty darn nice for being our very first try at this technique. Responses on Instagram have been positive, too, so we're excited to be delving deeper into this! Similar to tie-dye, they always come out so completely different. We used the same 8-10 colors for all of these paintings but the ratios and spread made each painting completely it's own. Pretty groovy. They also react pretty well to changing light colors, as Antho cycled our light through the color spectrum and each shade would make different portions pop out at us. 
Pretty groovy, man.


More photos below!

Friday, March 23, 2018

Art: Acrylic Pour paintings, round three


And we're back at it with the pour painting!
Man, I love doing this stuff! I've been so obsessed with it for ages and never realized just how easy it really was to do. A lot of the videos and tutorials I had read on creating the acrylic pour texture needed required expensive supplies you either order online or pick up from an art supply store and neither of those options was especially appealing or felt readily accessible to me. A small bottle of official acrylic pour medium starts at about $8, and is probably only good for a handful of paintings... now, don't get me wrong, the medium exists for a reason and it's made to interact positively with the paints and dry with a particular texture, so it's absolutely worth buying if you're extremely serious about your paintings. If you buy a large bottle (say a gallon or so) you get a better price by weight, but it's still far from what I'd call "cheap". And that's ok- it's a professional tool for professional painters, and though as an artist I could lament the cost of art supplies until the sun finally burns itself out, I understand the need for quality tools- and that quality often comes at a cost. 


But let's be real, guys. I'm an artist, and while I'm not outright starving (eating eggs on toast right now, actually, one of my favorite budget breakfasts), I'm not exactly loaded, either. I've gotta work within the confines of my quite constrictive budget. Since we're just now starting to experiment with this technique, it didn't seem practical to drop $50 on a gallon of paint-diluter when we also have to buy the paints and canvases with no guarantee on how well we'll like the results. It can be intimidating diving into new things. Believe you me, I get that. 


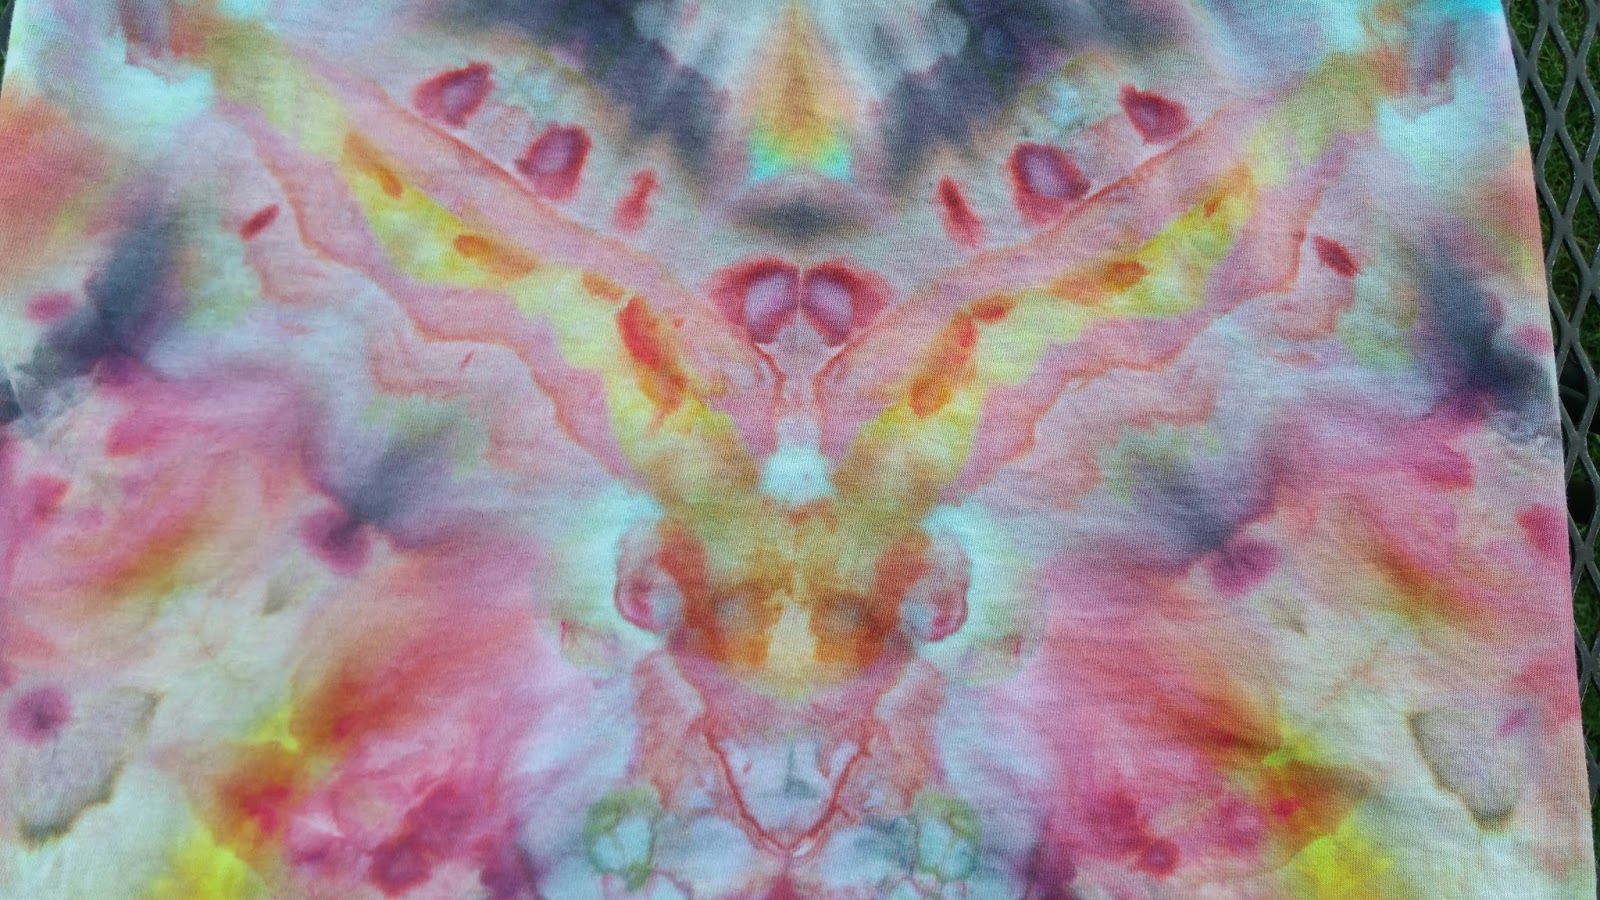
So for these, we opted for the dirty pour method. Instead of buying expensive pouring medium we opted for a gallon of simple old glue, which was about $10-11 at our local Wal-mart. Of course, since it's not a medium necessarily intended for these purposes the results may be a little off from what would be achieved using the much more expensive medium. We've been happy with our results, however, and to be fair we've been experimenting with using different silicone products in the process, too, so any textural weirdness could be attributed as much to that as the glue. Personally, I'm happy with how they've all turned out. You can judge for yourself after looking at the photos below~

Wednesday, March 21, 2018

Art: Behind the scenes of early March photoshoot for 710Visuals tie-dye


Welcome to another behind-the-scenes edition of the blog! On this post we're going to be delving in to a photoshoot we recently undertook in our home for the Etsy shop and our tie-dye business 710Visuals. These are some of the shirts I've been showcasing the making-of process for, so we're super stoked to finally be showing their final form to you guys! It's been a long time coming and we're still troubleshooting the ideal photoshoot set up for ourselves, but this was... something. The blank white sheet is to help prevent the background from competing with the shirts as well as to provide a template for when I needed to go in and tinker with the colors after in editing. I never want to over-do it in the photo processing stage because I want the colors to reflect as close to reality as possible. I don't even edit out my zits the majority of the time, haha. Luckily, when these photos were taken my skin was doing pretty good- no real pimples to cover up, and I didn't feel the need for much foundation or powder. I normally use a BB cream with Too Faced's Peach Perfect Loose Powder patted on top to set, but for these photos I just patted on some Milani Powder foundation real quick to even and brighten things up a smidge. 


Antho, of course, didn't need any make up for his fabulous face (not that I need make up, but I do appreciate it's power and really enjoy using it). We did, however, opt to put some of my Lime Crime Diamond Crusher in Trip on his lips at the end, though. He wanted to feel fancy and why not? Guys deserve to feel fabulous and have glitter lips if they want, too.


The tie-dye shirts photographed in this shoot are all now available in our Etsy shop for purchase, should you happen to find any that strike your fancy. We had fun doing the shoot and experimenting, though we'll likely be doing things a bit differently in the future. If we choose to shoot inside our home we will do it in a different location and/or with a different angle as the lighting was rather difficult to get precisely where we wanted it to be. Everything is a learning experience, though, and we'll figure out something even better for the next round! Keep scrolling for more photos!


Tuesday, March 20, 2018

Art: Spray paint dip painting first try


Liquid art is undeniably psychedelic, and that's one of the big appeals of it to us. Antho originally dove into light art after witnessing the judicious use of water and oil with dye on an overhead projector at an underground show here in Vegas and being amazed at the trippy visuals they were able to achieve with such a simple set up. That was ages ago and unfortunately, the mixer that was used to create our high tech visuals has gone MIA; likely having gotten lost somewhere between moving homes and shuffling things between storage units and abodes... surely it will pop up at some point again, but it's definitely put a damper on our projection art these days. We haven't been doing shows at all, though Antho has expressed an interest and sadness about it, usually circling back to the absent mixer with a sigh. 
I understand his sadness; it's a roughly $600 piece of equipment and it was an important investment for him to make and now it's...where? That's not an easy chunk of money for us to part with, so it's not something we could just pick up again tomorrow... so this important personal thing is just out there, in the abyss somewhere, and that's a shit feeling. Having moved countries a few times now and moved all around Vegas, I've had a lot of my personal belongings go missing or get lost along the way and though it's been cathartic for me to let go of some, there are definitely those items I remember and wonder about with a bit of disappointment. They're probably out there, too, in the abyss somewhere... to be found at some later time and date perhaps... but for now, we can make new art and experiment with other means of expressing ourselves. 


We tried acrylic pour painting recently and liked it so much we did it again shortly after, but we have several cans of spray paint floating around going unused so we thought we'd try something different after a few more hours spent on Youtube. For this endeavor, we simply filled a plastic tub with regular tap water then applied spraypaint to the surface. The paint would float and we could add more colors for a varied appearance... it was a lot of fun and interesting to see how different our paintings came out despite using the same mediums yet again. One thing we discovered right away is that the paint would harden up pretty quickly, so if we waited too long it would congeal on the surface. This meant that any additional design changes had to be done before the paint hardened, but that wasn't that big of a challenge, just a point of caution more than anything. 
More photos below!

Monday, March 19, 2018

Art: Acrylic Pour Paintings, second round


Any skill worth having takes time to perfect, and that's true of art as much as anything else. We tried pour painting for the first time not that long ago and we were thrilled with the results, especially since we opted to go low-budget with it and use Elmer's glue (less than $11 a gallon) instead of pouring medium (much more money). The first time through we didn't have any lubricant or oils to separate the paints, either, so we had a much smoother blend of colors. This time though we had a small can of WD-40 to use, so use it we did! I used a moderate spritz of it between adding each additional color, and the end result were the differentiated blobs of color drifting among the other shades you see above. I dig it. We still have plenty of paint, glue and WD-40, though canvases are already running out. We got what I thought was quite a generous amount, too, but I can't complain about how much art we've been making. It's been a real breath of fresh air, especially since so much of my 2017 was engulfed by a sales job that stressed me out and ran completely contrary to my character... 
I've never been especially fond of working in sales but considered it a necessary evil in this day and age, but the company I worked for through 2017 went about things in a particularly malicious and predatory way that I found hard to swallow. It obviously works for them as they're making over $100,000 each month off of tourists, but I can't tell you how many times I sold someone a deck of cards only to have them come back a short time later fuming and screaming in my face because they found the exact same item inside the same casino for one-third of the price...of course, the company I worked for doesn't offer refunds, so no amount of abuse from the customer could ameliorate the fact they were out whatever exorbitant amount they'd paid for the item. As someone who spent the better part of the last decade in a field that created product that resulted in consumers laughing at themselves, it was difficult to stand there and see people so upset and know that I was working as an agent of a company that directly preyed upon their naivety to pad their own pockets. That same lack of empathy extends to the employees, too, so don't worry- we weren't getting much better treatment than the customers were. Suffice to say, be wary when you're out and about and be especially cautious of any fast-talking sales people on the Vegas strip who seem over eager to sell you on an item or cut you a deal. Chances are you'll find the same item for a fraction of the cost somewhere else if you keep walking...and if you really want that thing right then and there, then go for it and help that sales person hit their commission for the day, but know that you're paying as much for the experience as you are for the item.


Right here, right now, though? We're here for the pretties. The good stuff, the soul healing happy making dance-inducing pretty things.
Let's art!


Saturday, March 17, 2018

Art: Acrylic pour paintings, first try


This was a first try for the both of us, so we were a bit nervous initially going into it but we ended up being quite thrilled with the results! We had been watching Youtube videos of various acrylic pour paintings over the months off and on, but after some research we learned of the dirty pour method which involves mixing several colours into a cup before releasing the paints onto the canvas and went with that. There are tons of different techniques and mediums available for achieving this sort of effect so it's really up to you and your imagination what you would do with it! We opted for a basic roygbiv color palette to start and mixed our acrylic paints with regular white glue to thin along with some water. Some painters will use a grease or lubricant (giggity) between layers of paint, or spritz them over the final painting, and this creates more bubbles and layering. It makes sense, if you think about it; acrylic mixes with water and oils and water do not mix, so using an oil-based substance to suspend the paints will create more texture and more bubbles of isolated colour that refuses to melt into the background. 
We, however, did not have any lubes (giggity) this time through, and instead went with just the modified paint. Mixing the paints with the glue and water was probably the most time consuming part, then finding places where we could safely pour the paint without spillage the next. It does take some time for the paintings to dry, though the actual time frame will vary depending on how thick the paints are on the canvas. We quickly learned that if you tilt the canvas too far, and the paints are too thin, much of your colour will go pouring over the side in no time at all! At the right viscosity, there's some more time to angle and adjust to ensure your canvas is covered and your colours have spread and created something you approve of. We only had Youtube videos to go from as far as the desired viscosity, but we were quite pleased with the results we had. Even though we used the same colours, each painting was completely different from the last! We're definitely excited to keep experimenting with this technique, and you can expect some more posts on the matter to come!